WriterShack groups are a great way to interact with others who have similar interests. This tutorial will teach you how to create your own WriterShack group with ease.
In order to create a group on WriterShack, you will need to be a registered member of the site. So, if you have not already done so, make sure you register via the home page.
Once you are a registered site member and have logged in with your credentials, you can begin creating your group by clicking Groups near the top of the page.

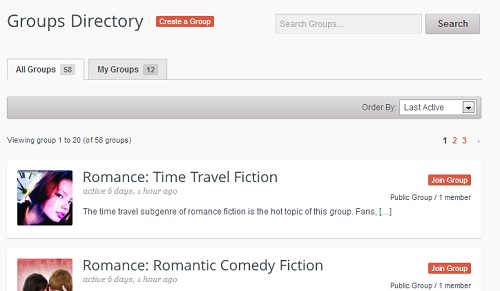
You will see the Groups Directory, which features all of the groups on WriterShack, as well as any groups you may belong to already. You can join groups via this directory page, and you can also create your own.
To create your own group, click on the Create a Group button.
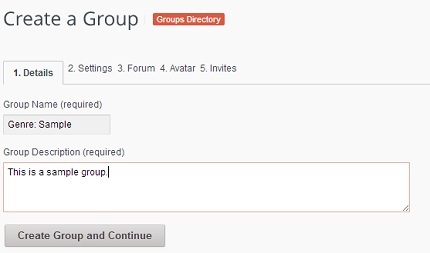
Now it’s time to enter your group name. Make it short, but descriptive. As a standard, put it in this format: Genre: Subgenre.
You can view other group names as a guide. After you have your group name, enter the group description. Make it inviting so that others will want to join. Describe who the group is for, what will be discussed, and what its intent is. Once entered, click on the Create Group and Continue button.
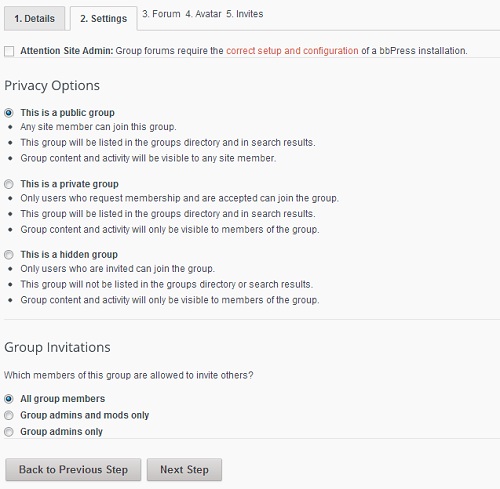
Next, enter the settings. You can choose whether you want the group to be public, private, or hidden. You can also customize its invitation settings here. Click Next Step to continue.
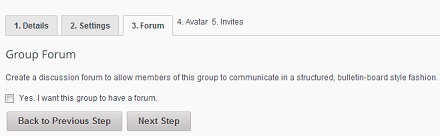
You will then be asked if you want your group to have a forum. This is a good idea if you want standard discussions to take place in a conventional forum format. Check the Yes box and click Next Step to continue.
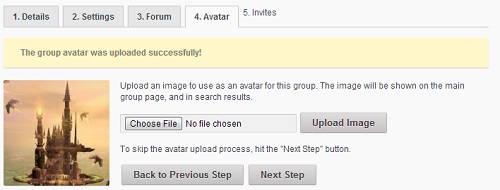
Choose your group avatar next and upload it from your computer. It should reflect the group’s purpose and be inviting. No avatars with nudity or offensive images are allowed. Once the avatar is uploaded, crop it to your liking and click Crop Image. Click Next Step to continue.
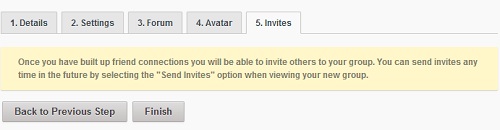
Complete your group’s creation by clicking Finish on the final page.
You should now see your group page.
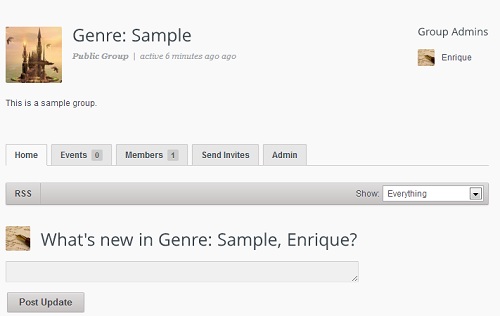
That’s it. You are done. Now it’s time to interact!